Tutorial: Colorizing Vintage Photos with Corel Painter
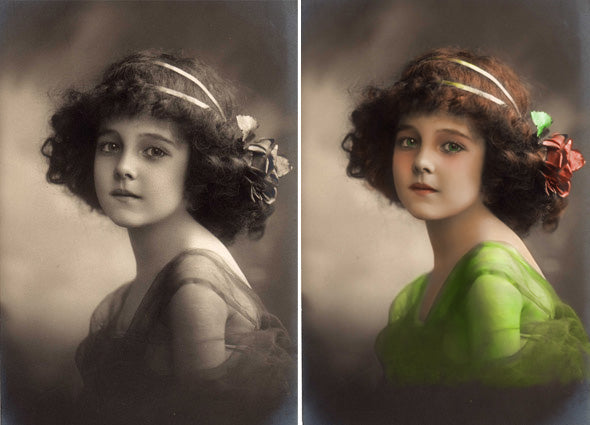
Turning a black and white photo into a color photo can be a challenge, even in with today’s advanced software. When you hear the word “colorization,” you probably think of an old movie on Turner Broadcasting. Or you may think of the pre-color film days, when photographers would use an airbrush to add color to photos. In either case, the coloring is flat and unrealistic. Luckily there’s a way to get much better results than that, and it’s built right into Corel Painter. It’s not quite as easy as hitting a “colorize” button, but almost. You can use this technique to bring vintage photographs to life, and turn your own black and white images into color paintings. If you’re a beginning artist just beginning the transition from monochrome to color, you may want to consider this technique. You can establish your drawing and values first in black and white, and then apply color without losing your under drawing. This is just another one of the many advantages of working digitally.
Painter has layer blending modes similar to Photoshop, but they are called composite methods. In both programs, these are found in the upper left corner of the layers palette. By choosing “Color” in either program, you’ll be able to paint a transparent layer of color which allows the layer below to show through. This works pretty well, but even better is Painter’s “Colorize” composite method. As you’ll see, it applies color only where there is some value of grey on the layer below. It won’t leave any color at all in areas of your photo that are pure white. For those areas, we’ll use a second layer with a composite method of Multiply. Multiply “adds” to whatever is below, even if it’s white. Experiment with both layer blending types to see how they work. This technique employs both together, each on a separate layer.
To get started, open your scan of an old photograph (or of a black and white drawing you’ve done) in Corel Painter. The image is on the background layer, which Painter calls the Canvas. Make the layers palette visible if it’s not already (go Window > Show Layer). We’ll do all our color work on layers above the Canvas, leaving the original image untouched. To add a new layer, go Layer > New Layer, or better yet, just click on the new layer icon in the layers palette. It’s the icon at the bottom, third from the left (see above).
Step One
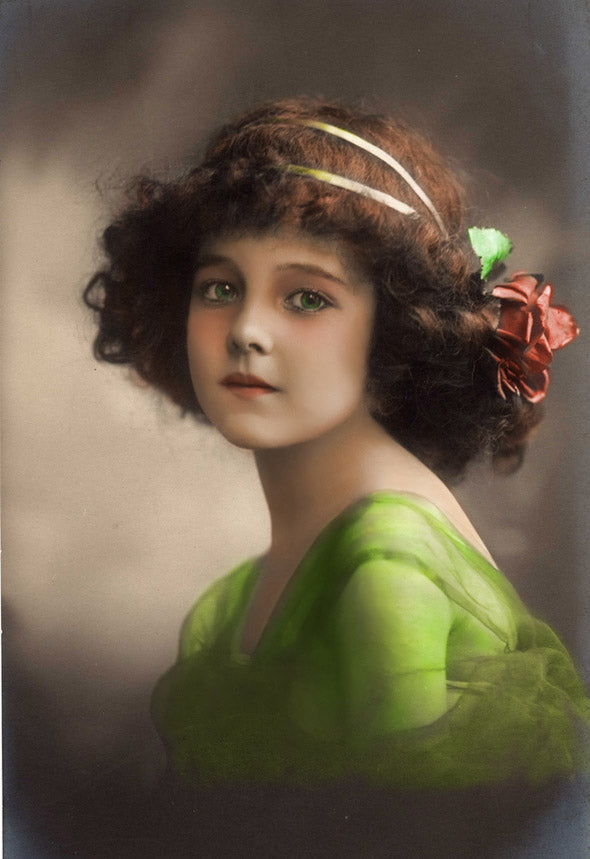
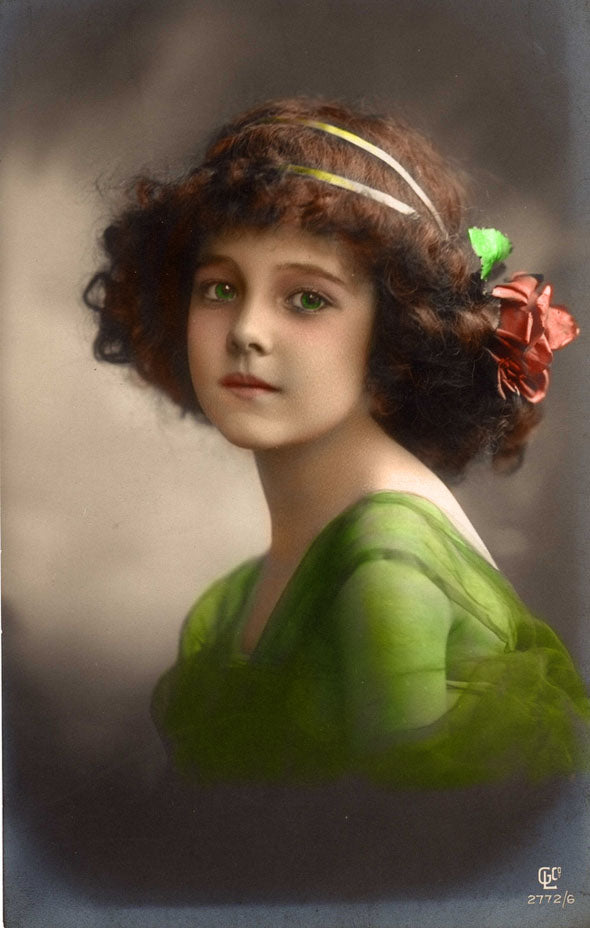
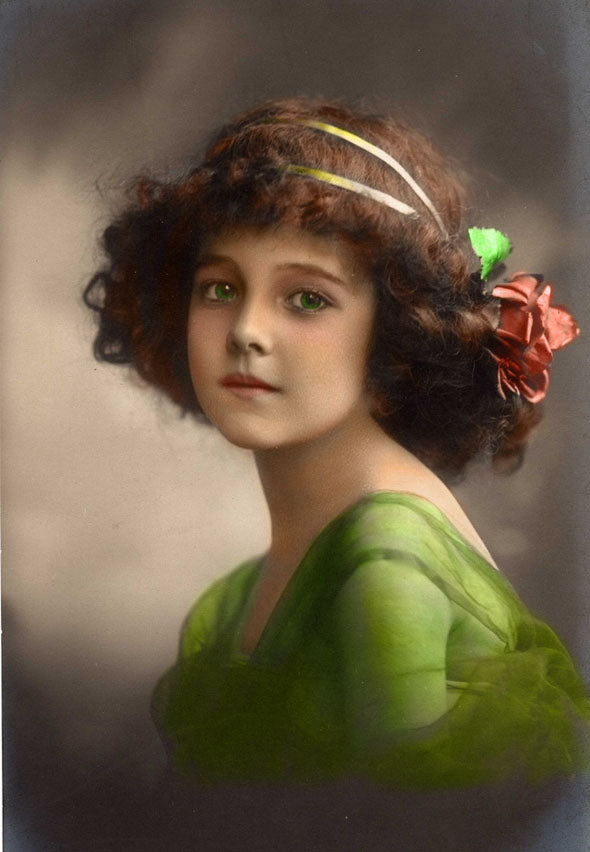
Double-click on the new layer’s name, and a dialogue pops up. Use this to rename the layer to “colorize.” With this layer active (highlighted), we can begin to add color. For this, I use the Soft Charcoal variant of the Charcoal category. Use an opacity of about 50%, and choose a light peach color. Set the resat value to 50%. With light pressure on the tablet, begin stroking color onto the face, making sure the colorize layer is active. You’ll notice that more color is applied to the darker areas of the face and neck. To avoid the usual flat look of colorizations, vary your colors as you paint. Use a rosier color for the cheeks and under the eyes. Choose a nice brilliant red for the lips. Add color as appropriate for clothing and hair. You’ll be applying washes of color that seem to magically combine with the greys from the photo. Here’s what you’ll have at the end of step one:
Step Two
Now add a new layer, and rename it Multiply. Change its composite method to (you guessed it) multiply. In the example above, you may have noticed that the area of the model’s shoulder (her back, really) and parts of her face are still white. As explained above, in colorize mode, the white accepts no color. So we’ll add a touch of color to the whites here on the multiply layer. Use the same peach color as before. If it looks too dark for a sunlit area, just lower the multiply layer’s opacity until it looks right. I used 90%.
Step Three
Things look pretty good already, but we’ll take it one step further. Clone the image by going File > Clone. Make sure that cloning is active (the “rubber stamp” icon is greyed out, as is the color wheel). Use the Soft Charcoal with the same settings as above. The Soft Charcoal acts as a blender, melting the greys of the original image with the colors you added. This results in a nice smooth finish, eliminating the grain of the old photo. That’s why the final image looks so much better than a plain colorized photo. You’ve really combined the color with the photo, not just sprayed it on top.