

Tutorial: Painting Clouds with Corel Painter
Originally Published July 2009
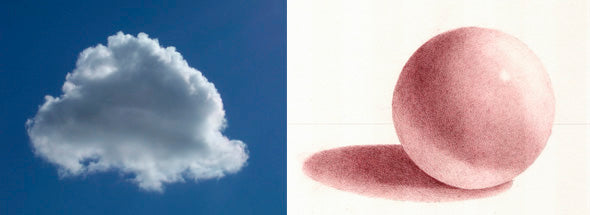
Painting a realistic, fluffy cloud may look hard, but just keep in mind the Five Lights of Nature, which apply to a cloud as well as to a sphere. Look at the sphere below, and you’ll see them: 1-Specular Highlight, 2-Soft Highlight, 3-Shaded Side, 4-Reflected light (along the bottom), and 5-Cast Shadow.
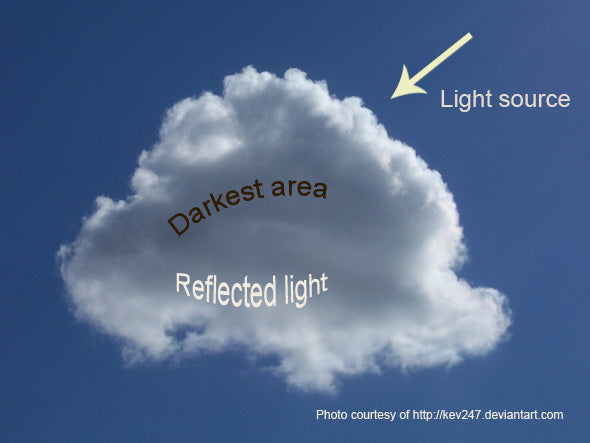
Notice that the cloud on the left is similar, though the cast shadow is outside the picture frame, down on the ground somewhere. Since a cloud is a soft object with lots of cottony texture, there isn’t really a specular highlight. But the brightest parts are those that face the light source. Treat your cloud as a three-dimensional, rounded object, and it will be easier to render correctly.
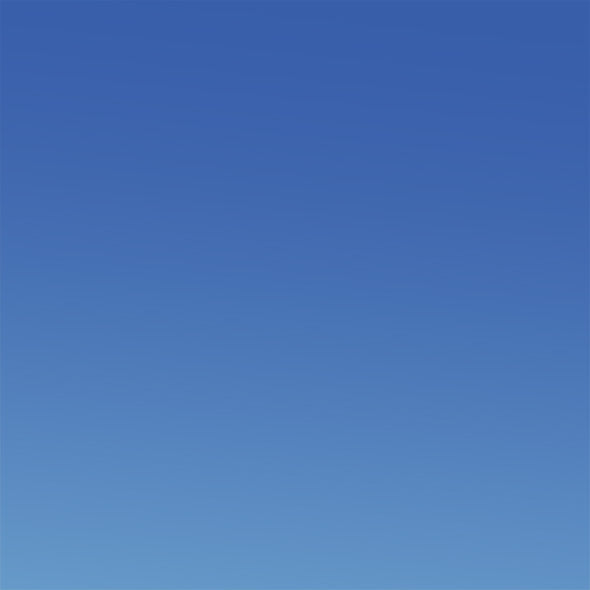
To begin, create a new document in Painter. Mine was 4 inches square at 300 dpi. Insert a new layer, and name it Sky Gradient. You can fill the layer with a solid, darkish blue, or go with a gradient, as I have here. (To create a gradient in Painter, open the Gradient Palette by going Window > Library Palettes > Show Gradients. Then pick a light blue for the background color, using the color picker, and a dark blue for the foreground color. Click on the Gradient Selector (more on that here), and then the tiny triangle in the upper right, and then Edit Gradient. This assigns your foreground and background colors to the gradient. Now go Effects >Fill > and select Gradient. Easy, right?)
The method I use here involves three layers on top of a fourth Sky Gradient layer. Notice that the highlights are sandwiched in the middle, so pay attention as we go through the steps. Here’s what the layers will end up looking like by the end:
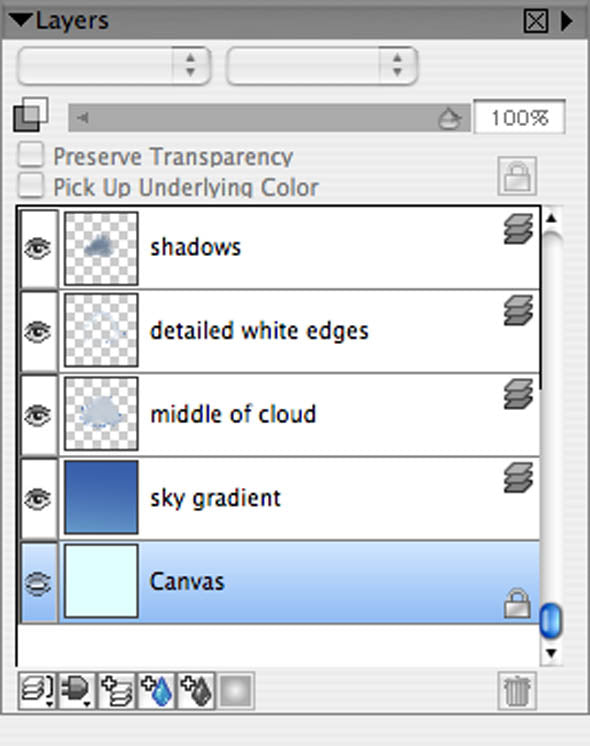
Insert a layer above the Sky Gradient layer, and call it Middle of Cloud. The brush you’ll use is the Just Add Water variant of the Blenders category. The settings are Jitter .68, Opacity 50, Resat 20, and Size 117. Pick a near-perfect white (just a little gray in it). Using quick, light dabs, paint the main form of the whole cloud in, dense in the middle, like so:

Next, insert a layer above Middle of Cloud, and call it Shadow. Stay with Just Add Water, but reduce the size down to 52. Now paint your shadows in, remembering to include a lighter gray along the bottom, to help give your cloud roundness. Don’t overwork it.

Here comes the tricky part. Insert a new layer above Middle of Cloud but below Shadow, and call it Detailed White Edges, or Highlights. Start out with a size around 25, and keep getting smaller to refine the detail. I did most of this part with a size 12. Reduce the Opacity to 20%. Pick a pure white color for this. Take your time with this part. Paint right into the shadows, which are on the layer above. This helps with making it look round. It really helps to work from a photo of cloud. Look closely at the cloud’s edges to see how they work. The edges are very important. It’s already looking pretty good.

You may want to erase some “overspill” on the Middle of Cloud layer at this point. Use the Eraser brush called Tapered Eraser at 20% Opacity, Size 10. You can see where I erased in the bottom right of the cloud.

Let’s refine that bottom edge (on Middle of Cloud layer) a bit more. Use the Grainy Water variant of Blenders, size 10 or so, with a resat of zero. Make sure clone color is turned off. Smear and blend the wispy edges to mimic a real cloud’s edges. You can work all around the cloud-edge and make it just perfect.

For the finish, I used a small Just Add Water, and really took my time to refine the edges on the Detailed Cloud Edges layer, with white. And there’s your cloud! By the way, you can use Photoshop for this, by using an airbrush with scattering turned on.


