

Tutorial: Create the Look of Bronze Sculpture
Originally Published February 2011
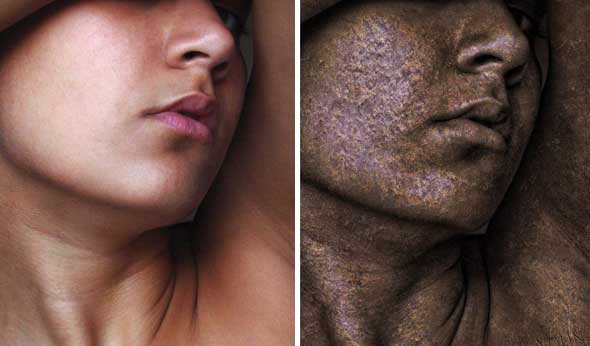
In this tutorial, I hope to shed some light on how to use textures to modify photographs. You may have heard an artist say “I applied a texture to get this effect,” but what does that mean? Is there a texture button? It’s actually pretty simple. A texture is simply an image file. Usually, it’s a closeup of a flat surface with some interesting, complex details, such as wood grain, concrete, painted canvas, rusted metal, etc. To “apply a texture,” insert the texture file as a layer above the image you want to change (texturize). Then, change the texture image layer’s blending mode to Overlay. The two images now interact with each other in interesting ways. That’s the quick explanation. Today, we’ll see how to apply two texture images to a portrait, resulting in a very convincing bronze statue look.
In this tutorial, I hope to shed some light on how to use textures to modify photographs. You may have heard an artist say “I applied a texture to get this effect,” but what does that mean? Is there a texture button? It’s actually pretty simple. A texture is simply an image file. Usually, it’s a closeup of a flat surface with some interesting, complex details, such as wood grain, concrete, painted canvas, rusted metal, etc. To “apply a texture,” insert the texture file as a layer above the image you want to change (texturize). Then, change the texture image layer’s blending mode to Overlay. The two images now interact with each other in interesting ways. That’s the quick explanation. Today, we’ll see how to apply two texture images to a portrait, resulting in a very convincing bronze statue look.
The image used here for this demo comes from Katlove on DeviantArt, and is used with her permission. The two texture files come from the ever-growing collection on my hard drive. I don’t remember where I found them. The idea, though, isn’t to duplicate what I’ve done, but just to get an understanding of texture layers and blending modes.
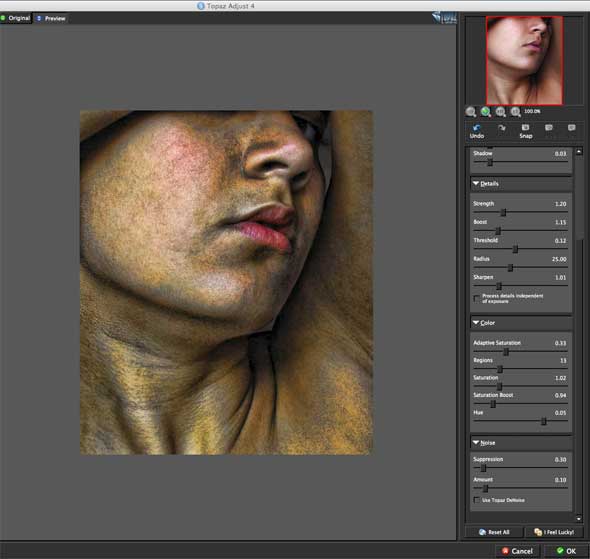
As in past tutorials, I decided to start with the powerful Topaz Adjust filter, shown above. The Spicify preset adds some nice detail without going overboard. Topaz adjust is an affordable replacement for the extremely expensive Lucis Art filter. I use it all the time.
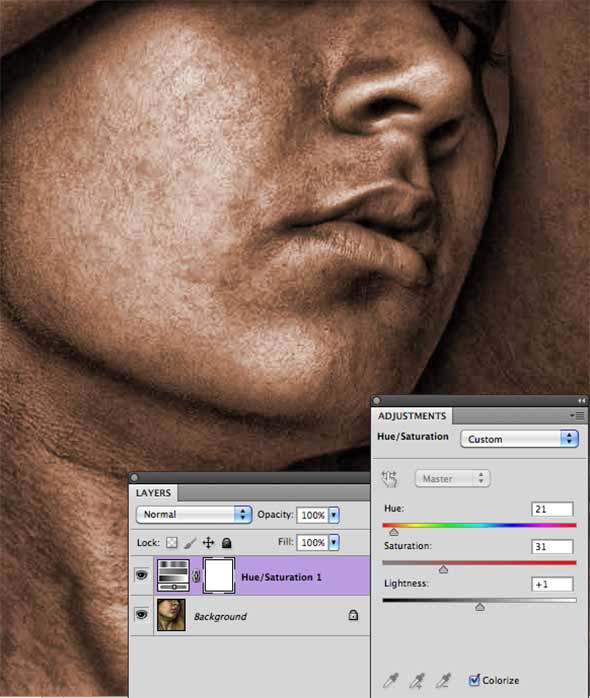
After running the Topaz Adjust filter, I insert a Hue/Saturation adjustment layer. Click on “Colorize.” This turns the image into a monochrome image, which is what we want. We’ll add some metallic colors with the texture files in a bit. But for now, we need to get rid of any hint of flesh tone or makeup. Slide the Hue slider back and forth until you achieve a bronze or dull brown-green. You may need to play with the saturation slider, too.
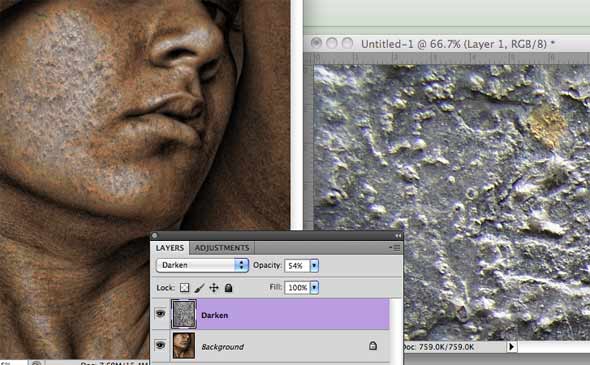
Now we’re ready to apply our first texture. For me, this is a lot of trial and error, and experimentation, with different files, until one does what I’m looking for. In this case, I wanted an aged, pitted surface, as if this were an old statue that had seen a lot of wear. That led me to try the file you see above on the right. Another thing to experiment with is blending modes. Overlay was okay, but when I chose Darken, the result was perfect. Darken leaves the image alone unless the texture image has areas that are lighter than the image you’re texturing. So, it added texture mostly in the highlighted areas (the cheek, nose, chin). Somehow, this seemed really convincing. So here’s the process, step by step.
First, find a texture file. Select an area of it, or select all, and then copy it. Back on the image you’re texturizing, highlight/activate the image layer (Background, in this case). Do Edit > Paste (or CMD/Ctl +V), and the texture copy is added as a new layer above the Background layer.
Second, resize the texture. It’s probably too small. So use the Edit > Transform options to Rotate and Scale the texture until it covers the whole Background image.
Third, change the texture layer’s blend mode. Start with Overlay, since most of the time that’s the right choice. You can vary the opacity setting if the effect is too strong. For this first layer, use the Darken blend mode, and turn the opacity down to about 50%.
Now, at this point you could add a layer mask to the texture layer, and mask out areas that you don’t want the texture to cover. Just something to keep in mind.

Insert a Hue/Saturation adjustment layer, and slide the Hue slider until the color is bronze, or whatever color you’re after. To finish, I did a little dodging and burning here and there. And that’s how to make a bronze sculpture in Photoshop! I hope you enjoyed this tutorial.

