

Tutorial: How to create your own Image Hose nozzles
Originally Published November 2008
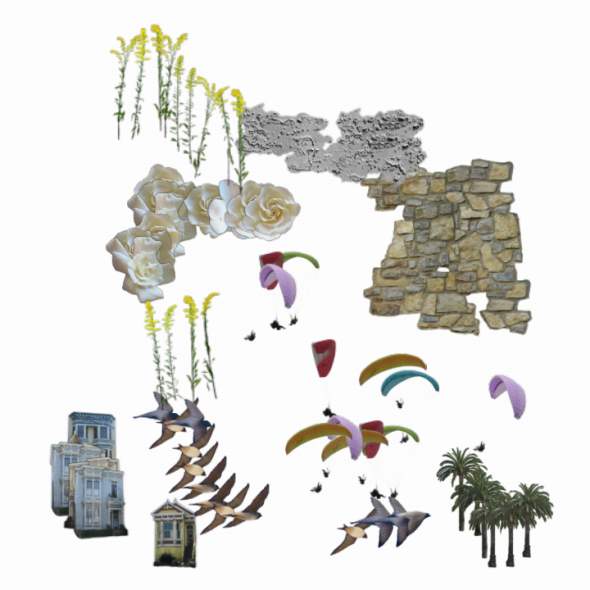
The Image Hose is probably one of the most misunderstood tools in Corel Painter, and yet it’s pretty easy to use, and even customize with your own images. If you’ve ever tried the Image Hose (it’s one of the brush “variants,” right between Gouache and Impasto), you may have been reminded of a kid’s drawing program called KidPix. It worked much the same way, spraying a bunch of images across the page. Here’s a quick sample of the images that ship with Painter.
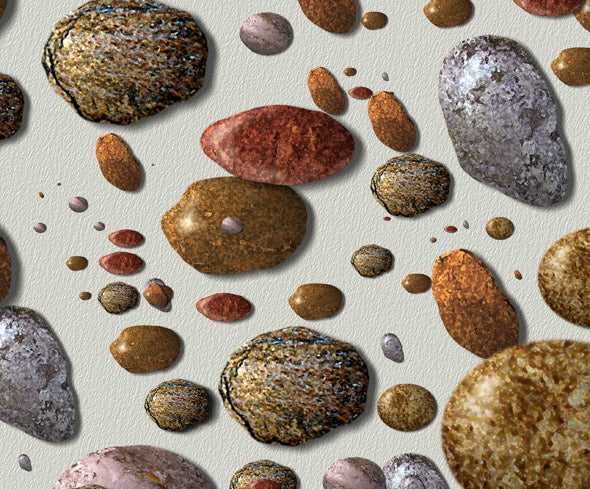
You may have given the Image Hose a try once, and scratched your head wondering why in the world you would need to spray a series of paragliders across your canvas. In order for the Image Hose to be really useful, you need to create your own custom nozzles for it. It comes in really handy when you’ve got a lot grass or trees to paint, or a rock wall, let’s say. And it’s actually quite easy to do. Just create a document (a file in Painter’s native RIFF format) with two or more layers, group the layers, and tell Painter to create a nozzle from the group. That’s it! Today I’m going to show you how I created the stones image above, using my own custom stones nozzle. You won’t believe how easy it is.
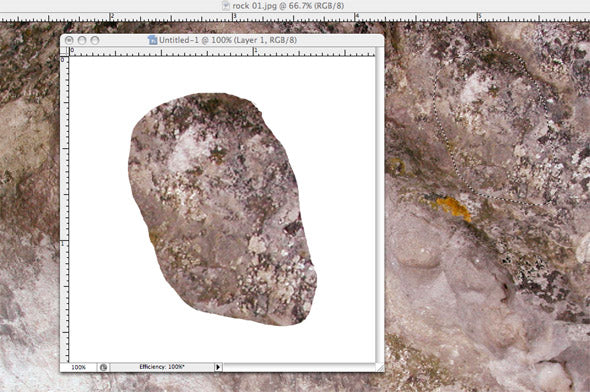
First, I’ll go over the quick method I used to create the stones. These stones took me about 5 minutes each to create. To get started, you’ll need a photo of a rocky surface. You can take some photos of boulders with your camera, or download them from a stock photo site. With the lasso selection tool, draw a roughly roundish shape, and copy/paste it into a new document.
Now go to Filter>Liquify, and with a big brush push the sides inward. This will crowd the details around the edging, which helps with the 3-dimensional illusion we’re after. Once you’re done, the rock should be looking less flat (see left image, below). Then use the Filter>Artistic>Sponge, to get the results you see on the right, below.
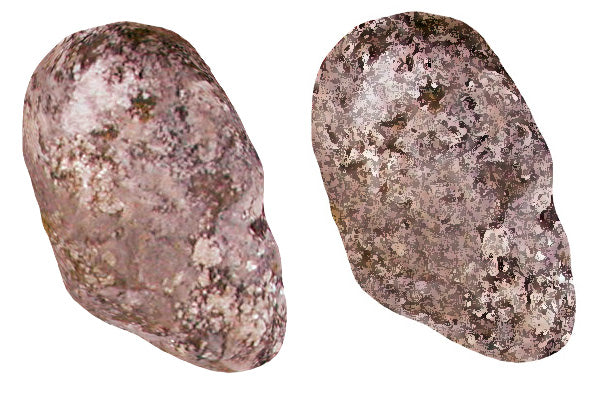
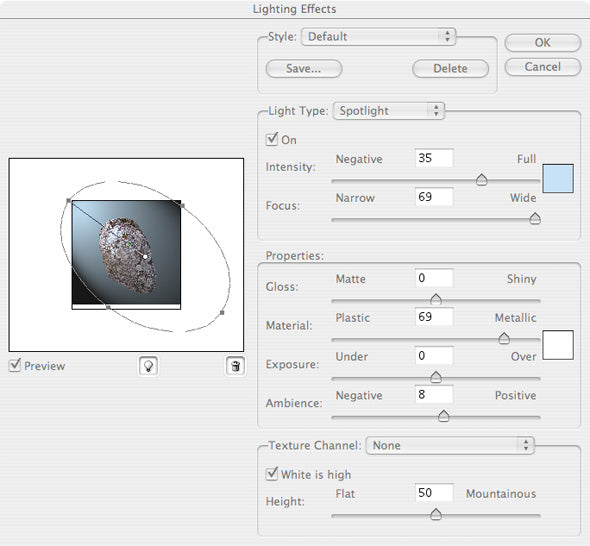
The settings for the sponge filter are: Brush Size 0, Definition 24, Smoothness 1. You could use one of the other filters, such as fresco or dry brush. Next, go Filter>Render>Lighting Effects. Pick a color for your light, or go with white. The color will change the appearance of your stone dramatically. See the screenshot below for placement of the light source. Basically, you want light on one side, dark on the other.
Next, you can apply a drop shadow, using the drop shadow layer style, and it will look like this:
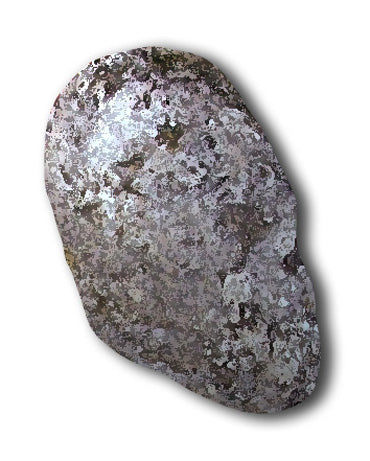
The problem with creating drop shadows in Photoshop is that Painter can’t read them. So hold off on drop shadows for now. You’ll create them in Painter, later. At this point you can also use a little dodge and burn to help add to the illusion of depth, but that’s optional. I used the dodge tool to make some of the stones look shiny.
You can create many stones using the same rock texture image, just by varying the lighting effects and the shapes you copy and paste. Create each stone as its own file. Once you have six or so (the more the merrier), use the move tool to drag each of them into a single document. This will create a separate layer for each stone image. Save this document as a PSD file, and close Photoshop. Open this document in Painter. (If you used layer styles for drop shadows, Painter will tell you it’s removing them. Just click OK.) Now you should have a Painter image open with all of your layers, one per stone.
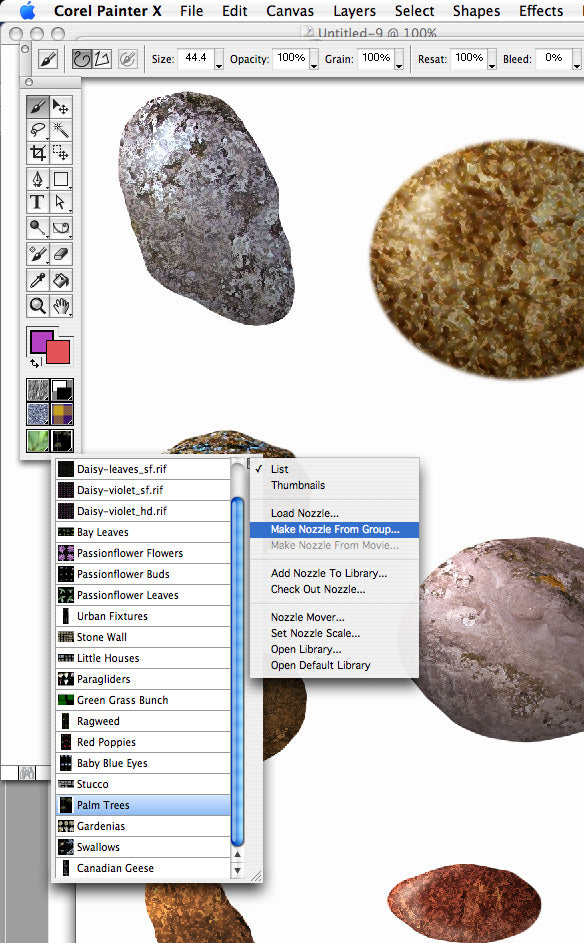
To add drop shadows, go Effects>Objects>Create Drop Shadow. The dialogue box is not as easy to use as the one in Photoshop, but it accomplishes the same thing. Once you’ve created the drop shadow, Painter creates a layer group, which you need to collapse. With the group selected, go Layer>Collapse. It will rename the layer to something like “Layer n and shadow”. After creating drop shadows for each layer, you’re ready to create the group. Click each layer, holding the shift key down to select them all. Go Command (Mac)/Control (Windows) + G, to group the layers (or go Layers>Group). To create the nozzle file, locate the Nozzle Selector (see below) and click on the tiny triangle in the lower right corner of the icon to open it. Then, click on the triangle in the upper right to get to the menu shown here.
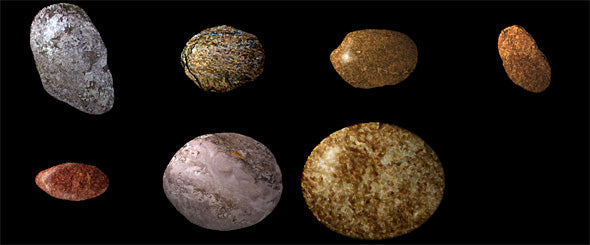
Once you click on “Make nozzle from group,” Painter creates a new file in RIFF format. Give it a name with “nozzle” in the title, like Stone nozzle.rif. It should look like this:
Congratulations! You have created your very own nozzle file. To use it, select the Image Hose brush. To load the nozzle, go back to the tiny Nozzle Selector icon, and this time choose “Load Nozzle…”. Browse to the file you just created (Stone nozzle.rif). Now you can paint with your new nozzle.
This was a rather long tutorial, since it’s really two tutorials in one (create stones in Photoshop, and then use them to create a nozzle in Painter), but I hope you found it clear and easy to follow. If you have any questions, or something doesn’t work quite right, please leave a comment and I’ll try to respond quickly. Thanks!

