
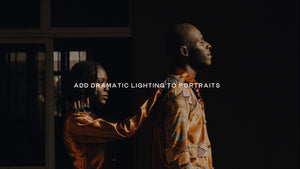
Add Dramatic Lighting to Portraits
Originally Published August 2010
I admit it: I love layer masks. Layer masks rock. For adding darks and lights to an image, nothing beats an Adjustment Layer with a Layer Mask. If you’re a diehard Dodge and Burn addict, I hope to sway you away from, er, the Dark Side. The main advantage of layer masks is they are non-destructive. You can continue to tweak and adjust as much as you like, and the main image pixels are never touched. On the other hand, once you’ve dodged or burned the original pixels, the only way back is via the Undo command. Well, instead of ranting away here on my soapbox, let’s just dive in and take a look at how layer masks can be used.
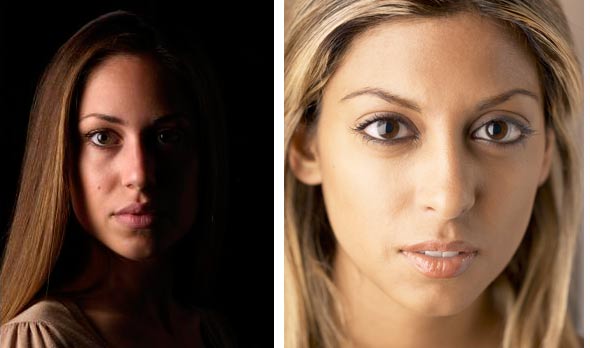
The photo above, on the left, has dramatic side lighting, created by the lighting setup in the studio. What if you wanted to get the same effect with the photo on the right, which is evenly lit? You guessed it: Layer Masks to the rescue. With the method I’m going to show you, you can add dark shadows to one side of the face, without a single pixel of paint. We will darken the existing pixels (non-destructively, of course) using a Curves adjustment layer. Then, we’ll remove the darkening from the left side of the face with a layer mask. The photo I’m using in this tutorial comes from Deviant Art member Katanaz_Stock.
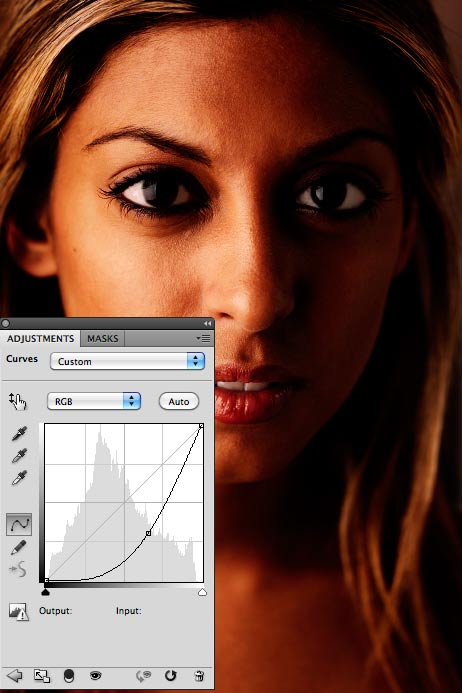
After opening your image in Photoshop, insert an adjustment layer. The easiest way to do this is to click on the icon in the middle at the bottom of the layers palette. It looks like a circle that’s half white and half black. Click on the icon to get a drop-down list of adjustment layer types, and select Curves. This gives you a new layer with Curves and a layer mask all ready to go. In the Curves dialog, grab the curve a bit below the middle, and drag it downwards. As you do this, keep your eye on the right side of the face. Drag downward just until the side of the face (our right) is barely visible. (See below).
Now we’re ready to do our layer mask magic. There are some keyboard letters that are useful for this. First, type the “D” key, which changes the background and foreground colors to the Default, which is black and white. The other letter to keep in mind is “X”. Typing “X” causes the foreground and background to switch places, which is easier than doing it with a mouse or tablet.
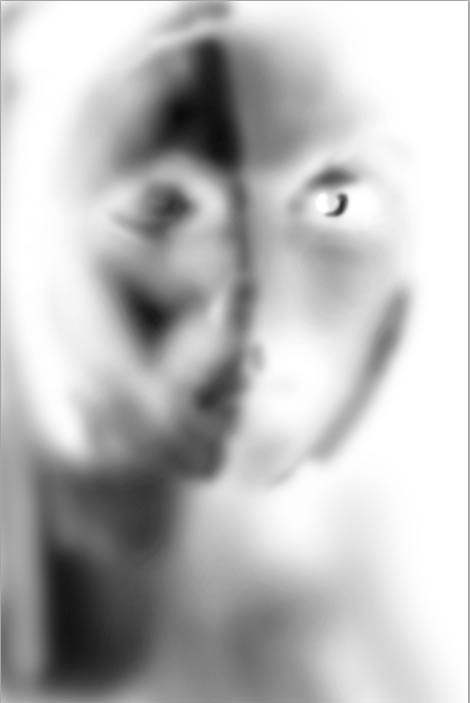
Over in the Layers Palette, activate the layer mask by clicking once on it. An anemic little line appears around the layer mask to let you know its active. If you begin painting with white, let’s say, and the image is turning white, you are not on the layer mask: you’re on the image itself. Just undo and activate the layer mask, and all will be well. By default, the layer mask is white, which means the mask is not masking anything. All the pixels changed by the Curves are coming through. We need to block the left side (our left) of the face. Make sure the foreground color is black (use “X” to switch it from white, if you need to). Set the brush opacity to 50% or so, flow to 30%. Now start painting on the image itself. This is the weird part, I know. You feel like you’re painting black on your nice photo, but you’re not. You’re actually painting on a separate channel Photoshop has created for you, which contains the mask. Click on the Channels palette to see the mask channel, if you’re curious. As you start to paint, the image gets lighter where you paint. Notice that in the layer mask icon over in the palette is no longer all white, but has a mini-version of your mask on it. If you hold down the Alt/Option button and click on the layer mask icon in the layers palette, your image changes: now you’re looking at the mask channel itself. This is what you’ve been painting.
If you find an area is too light, just tap the “X” key to switch back to white as the foreground color, and paint to bring back the dark. Easy as pie. This is what I love about layer masks. It’s like you’re painting with an image adjustment. In fact, you could have started with an all-black mask (just fill with the paint bucket), which would have hidden all the Curves darkening. Then, you could reveal the dark by painting with white. You will find yourself using both approaches, depending on the image you’re working on. In this case, it’s less work to remove the dark from one side of the face, and leave it everywhere else. You’ll notice that I do paint a bit on the dark side of the face. This is too give the jawline a bit of “rim light”, and to let the cheeks show more. I also paint in the eye to help it stand out. I use a heavy black stroke on the right side of the iris, to make it glow. But this isn’t quite enough. So I added a final empty layer on top, and painted with orange-brown (just a bit) to bring out the iris color. Here’ the final result:
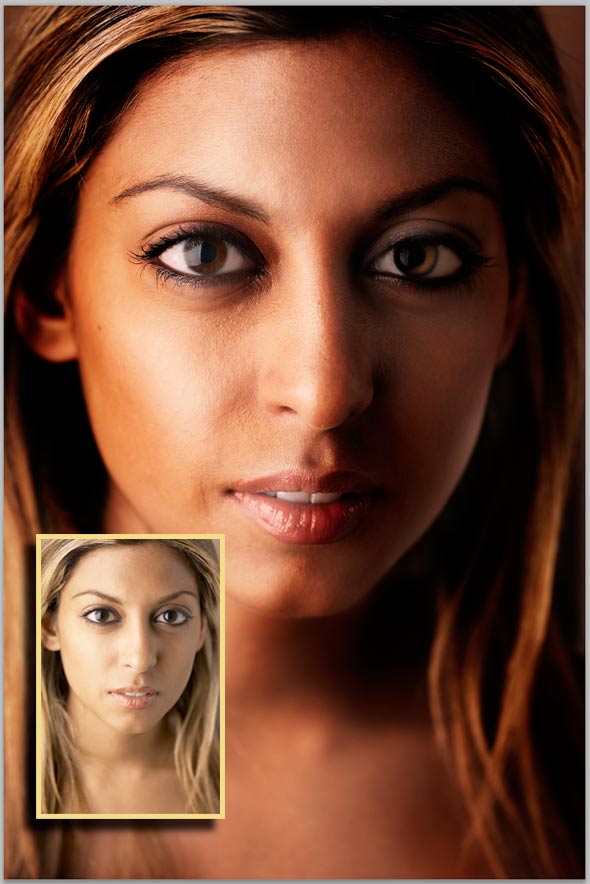
In this close-up, you can see that the photograph still retains all the pore structure and detail. We didn’t use opaque paint. We selectively applied a Curves adjustment, using a layer mask.


